
Adding a label component to an HMI is an efficient way to create specific titles, descriptions, etc. with the option of assigning a parameter.
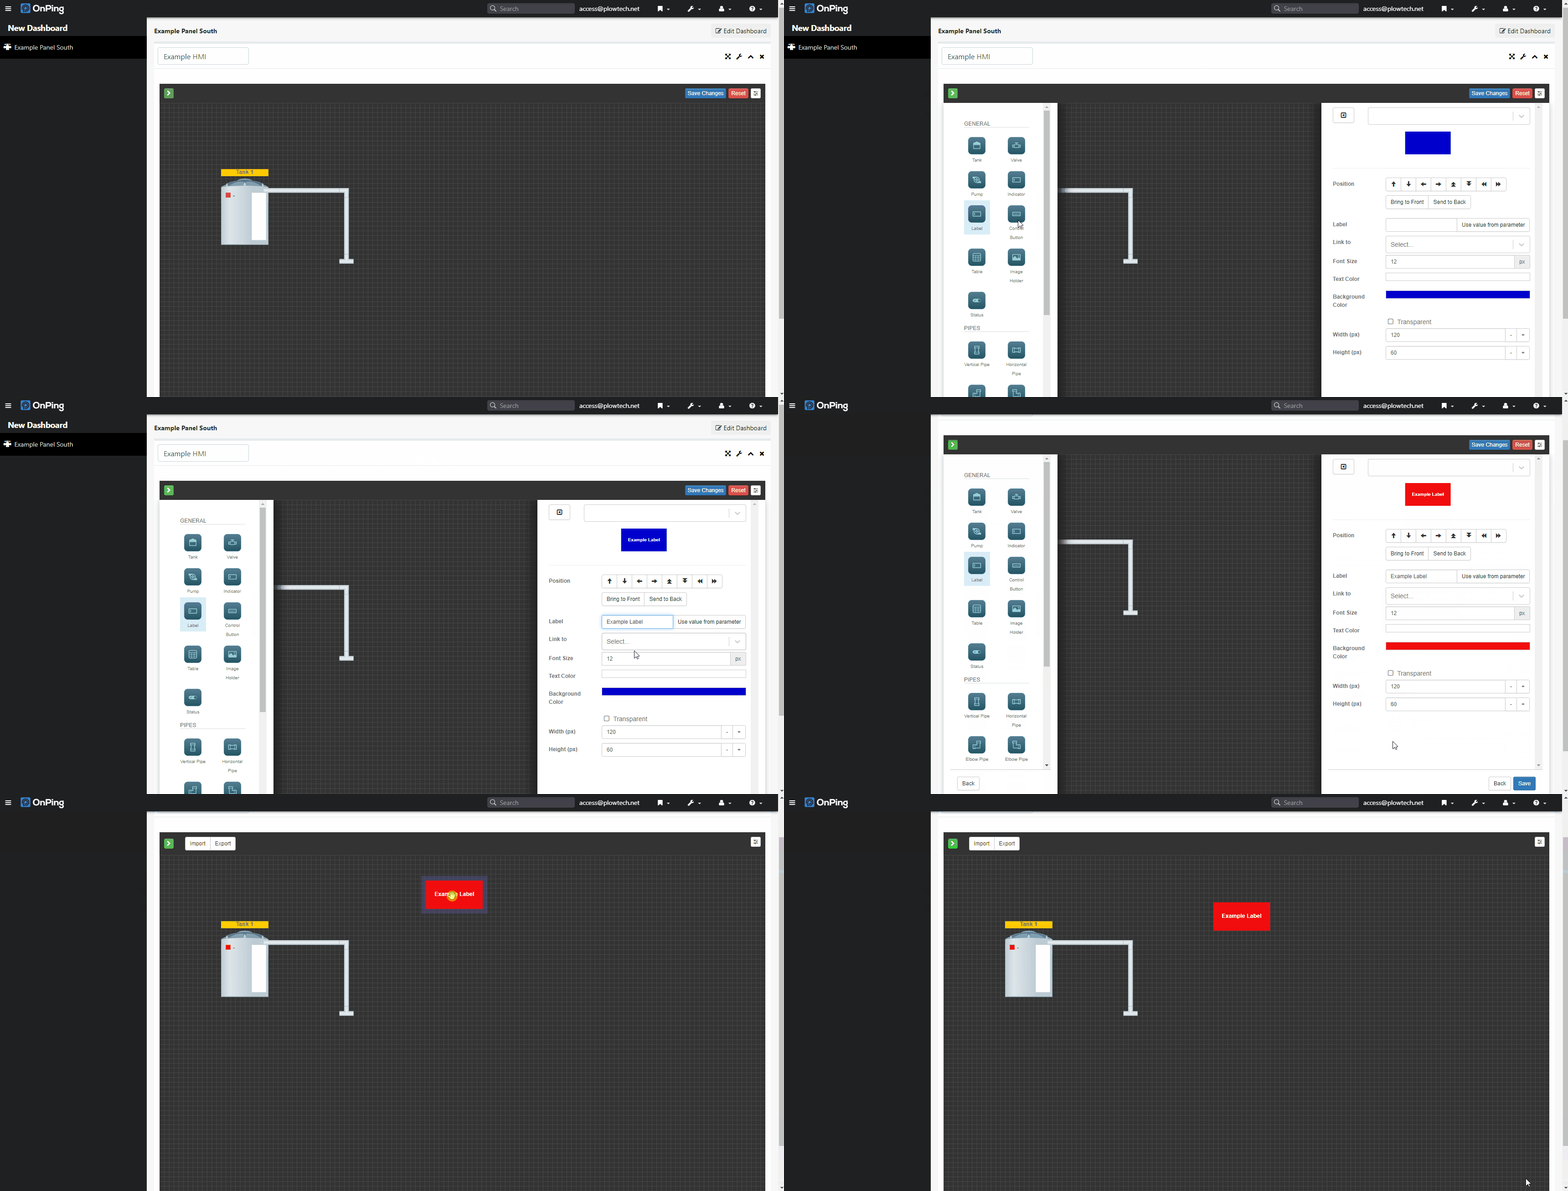
1) After adding an HMI to the dashboard (as done in this tutorial: Creating an HMI), you can edit it to add desired components. You do not need to be in edit mode to do this, just click on the arrow in the upper left corner of the HMI box.
2) To add a label component, click on the “label” icon. This will bring up the preview box where you can enter the label name.
3) You can also click “use value from parameter” instead to assign a parameter instead of entering a label name.
4) You can then choose the font size, text color, background color, and background width for the label, or leave any of it at default.
5) Click “Save” at the bottom of the preview box.
6) Once the label component appears on the HMI screen, you can click on the component and use the direction arrows to rearrange the screen.
7) Click "Save" to save your changes. Make sure you click this or your changes will not be saved! A green banner will appear confirming your changes have been saved. (you may have to scroll up to see that banner)
Comments
0 comments
Please sign in to leave a comment.