
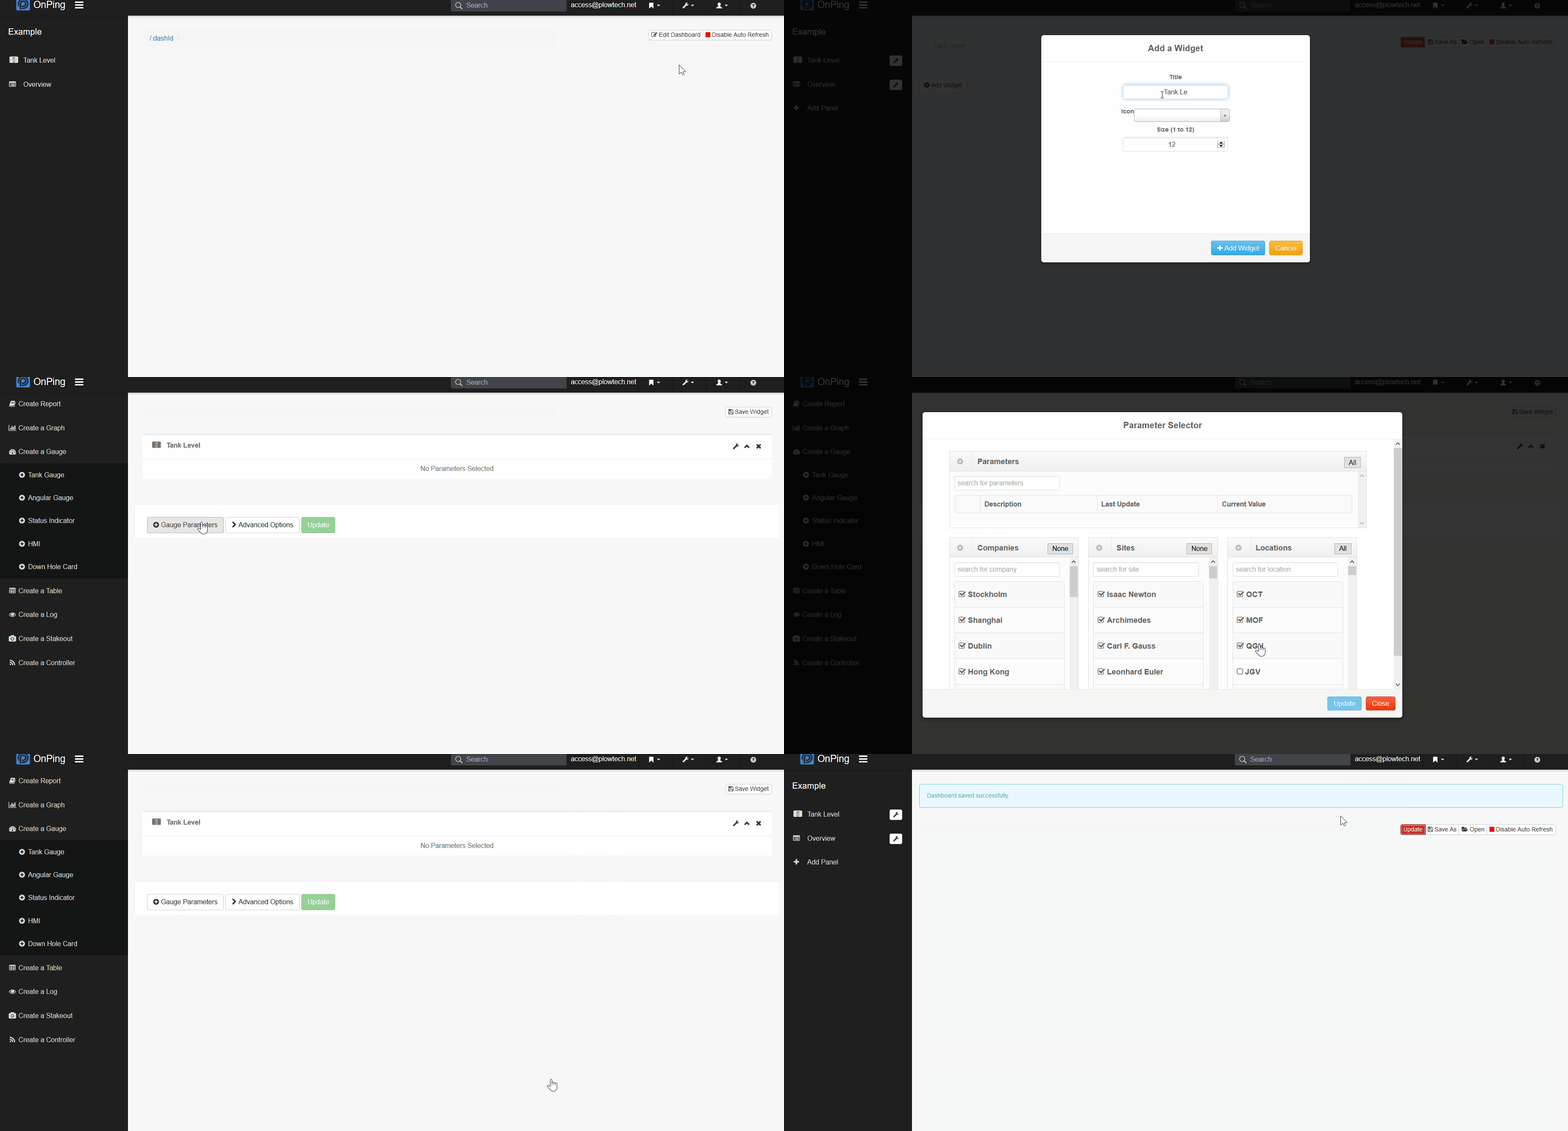
 A widget is a resizable window that goes on a panel, and panels go on a dashboard. Once we create a widget, we will also add content to the widget, in this case we will add a gauge. This process is the same for charts, HMI's, applications, gauges and charts.
In order to follow this walk through you need to be able to log in to OnPing and have already added a panel to your dashboard.
1) Log in to OnPing, click edit dashboard on the upper right.
2) Now in edit mode, click the panel we created in the Adding a Panel tutorial.
3) If you are using the panel we created in the last tutorial, or a fresh panel, you'll see the " + Add Widget " button appear on the blank page. If you are using a panel that already has content, you may need to scroll down the page to find it. When you locate it, click it to add a new widget to this page.
4) Clicking " Add Widget " will bring up the add widget dialog box. Give it a name here and select an icon for it, the default icon size is 12 and you shouldn't need a reason to change it. When you've finished click " + Add Widget "
5) Now you have a widget, but no content in it. Think of a widget as a container within your dashboard, until it has content in it, it is empty. So, to get started adding content click " Add Content to this Widget "
6) For this tutorial we will be adding a tank level gauge, but there are a lot of options to choose from. Select the content you'd like to see in this widget in the side bar. In this case we are choosing " Create a Gauge ".
7) Then we'll choose " Tank Gauge "
8) Then " Gauge Parameters " to add content to this gauge.
9) The dialog box that comes up now is very similar to all dialog boxes for gauges, charts, and visualizations of all kinds. The idea here is to assign your visual gauge to a sensor in the field. If you know the name of that sensor, search for it in the search filed, otherwise, select your company, site, and tag name. Then hit update, and close.
10) Next, in this case, set tank indicator color, and height (max height of the real tank) and hit update to view the tank.
11) When the tank is visible and looks correct, click " Save Widget " to finish it up.
12) Finalize this process but clicking " Update ", you should then see confirmation that the panel and widget have saved.
If you have any thoughts, ideas, or questions, please feel free to leave a comment below or use the contact feature at www.onping.net
Comments
0 comments
Please sign in to leave a comment.